Datacenter Router and Transit Gateway Deployment
Transit Gateway Key Definitions
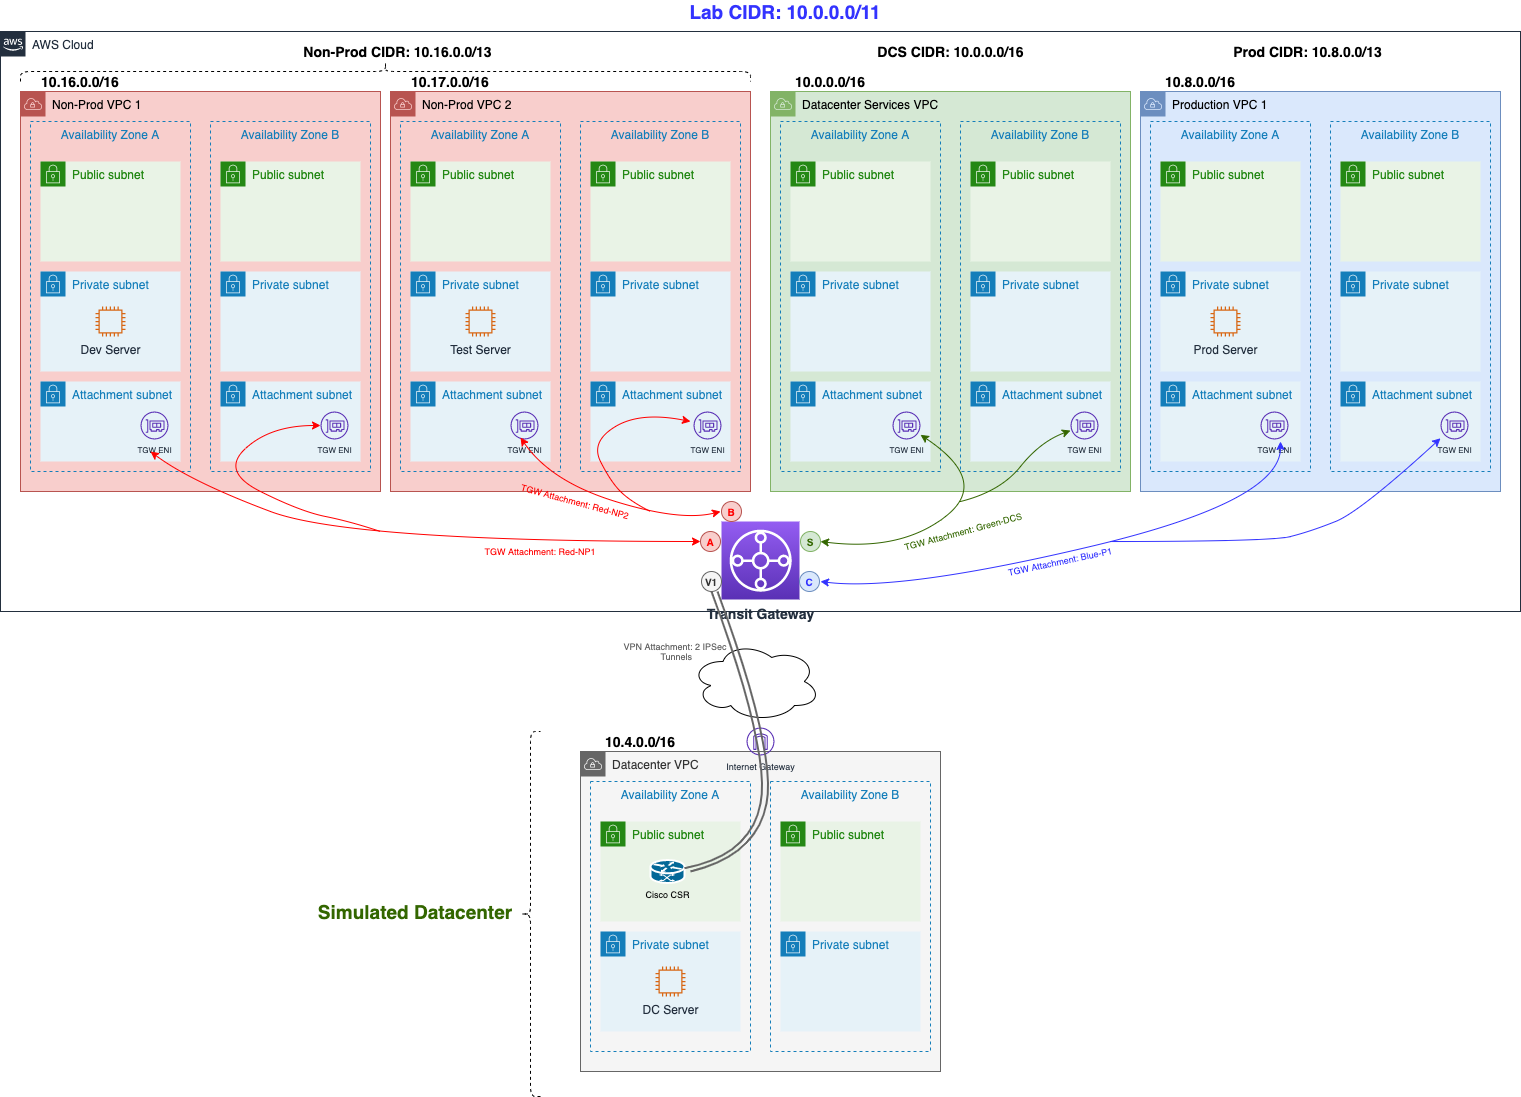
Before we dive deeper into the Transit Gateway and our Cisco router, let’s spend a minute covering the Transit Gateway key components. Feel free to refer back to these definitions if you need guidance further in the lab. We have also attached the previous diagram for reference. Note that each colored line towards the Transit Gateway represents a different route table (red, blue, green), as we will see in the upcoming content:
-
Attachment — You can attach a VPC or VPN connection to an AWS Transit Gateway. You can also associate (same effect as attaching VPC/VPNs) a Direct Connect Gateway for Direct Connect connectivity.
-
Transit gateway route table — A Transit Gateway has a default route table and can optionally have additional route tables. A route table includes dynamic and static routes that decide the next hop based on the destination IP address of the packet. The target of these routes could be a VPC, a VPN connection or a Direct Connect Gateway. By default, the VPCs and VPN connections that you attach to a Transit Gateway are associated with the default Transit Gateway route table.
-
Associations — Each attachment is associated with exactly one route table. Each route table can be associated with zero-to-many attachments.
-
Propagations — A VPC or VPN connection can dynamically propagate routes to a Transit Gateway route table. With a VPC, you must create static routes to send traffic to the Transit Gateway. With a VPN connection, routes are propagated from the Transit Gateway to your on-premises router using Border Gateway Protocol (BGP).
Datacenter Router and Transit Gateway Deployment
Using a predefined CloudFormation template we will deploy a Cisco Router (Cisco CSR) into the Datacenter VPC simulating our on-premise VPN router. In addition, a Transit Gateway will be deployed with a couple of Transit Gateway route tables.
-
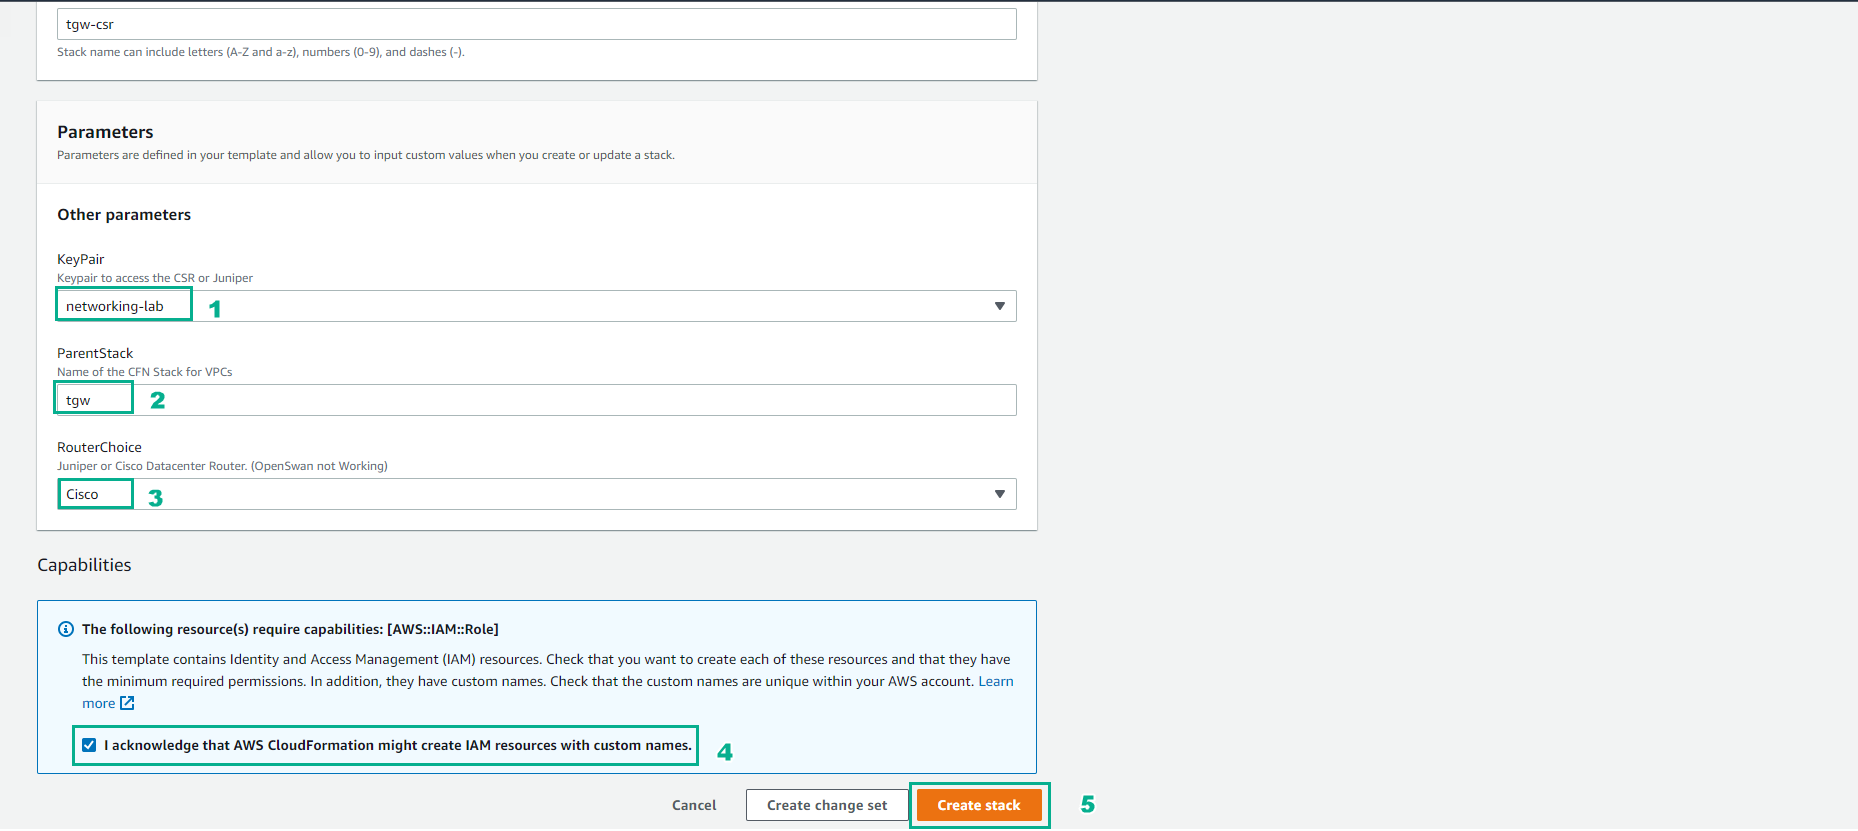
Access the creation interface Stack CloudFormation
- Perform configuration, enter the stack name.
- Select Key Pair created in the preparation step
- RouterChoice, choose Cisco
- Select Capabilities
- Select Create stack
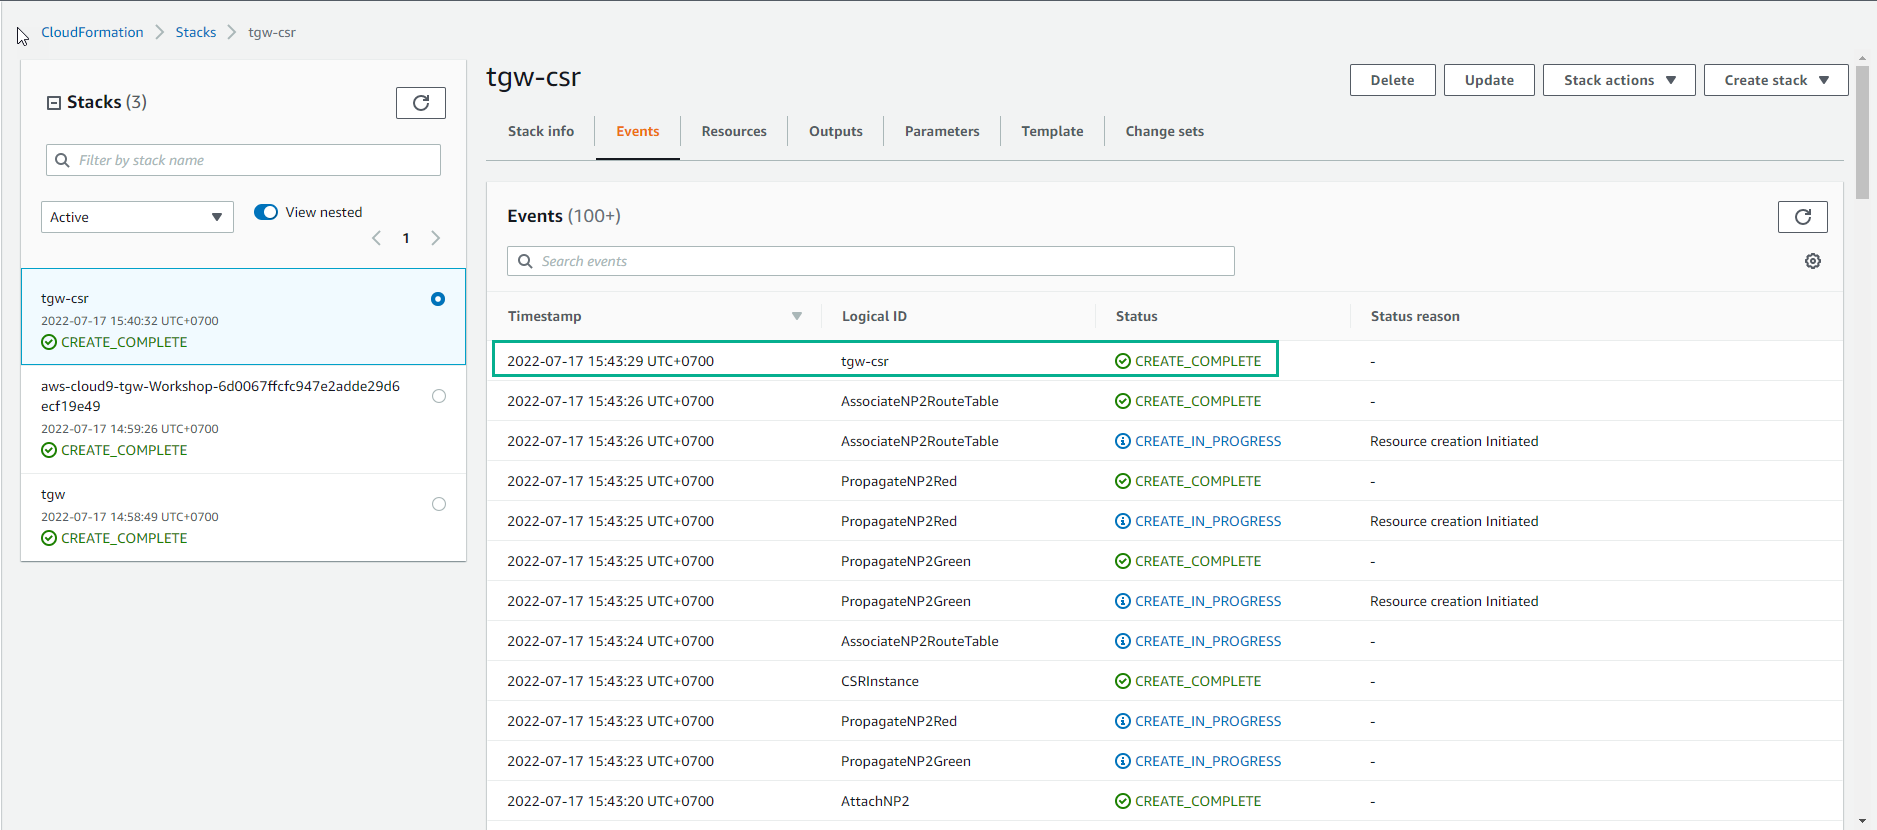
- Wait about 20 minutes, you have finished deploying the resource
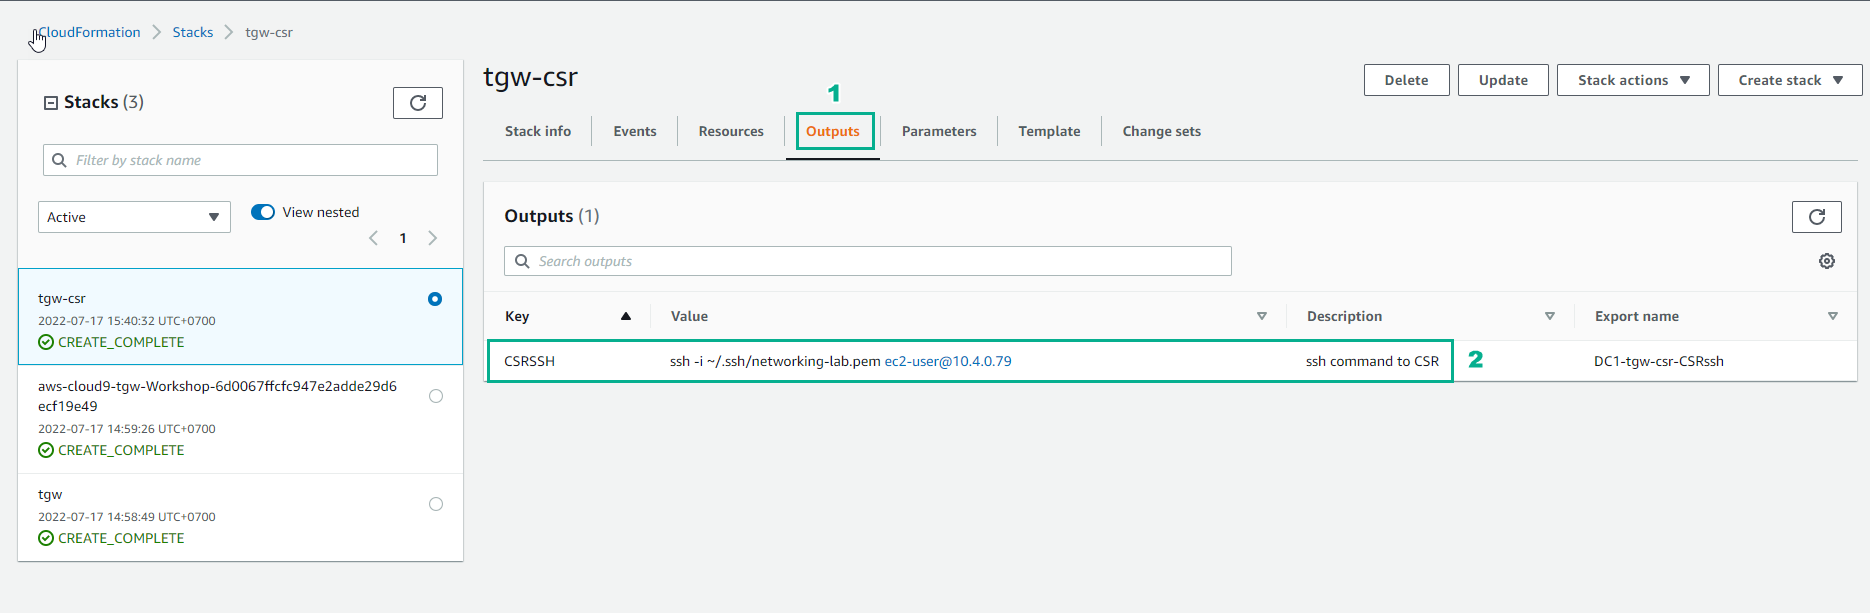
- In Output of Stack CloudFormation we will see Key-Value which we will use to SSH into the Data Center.
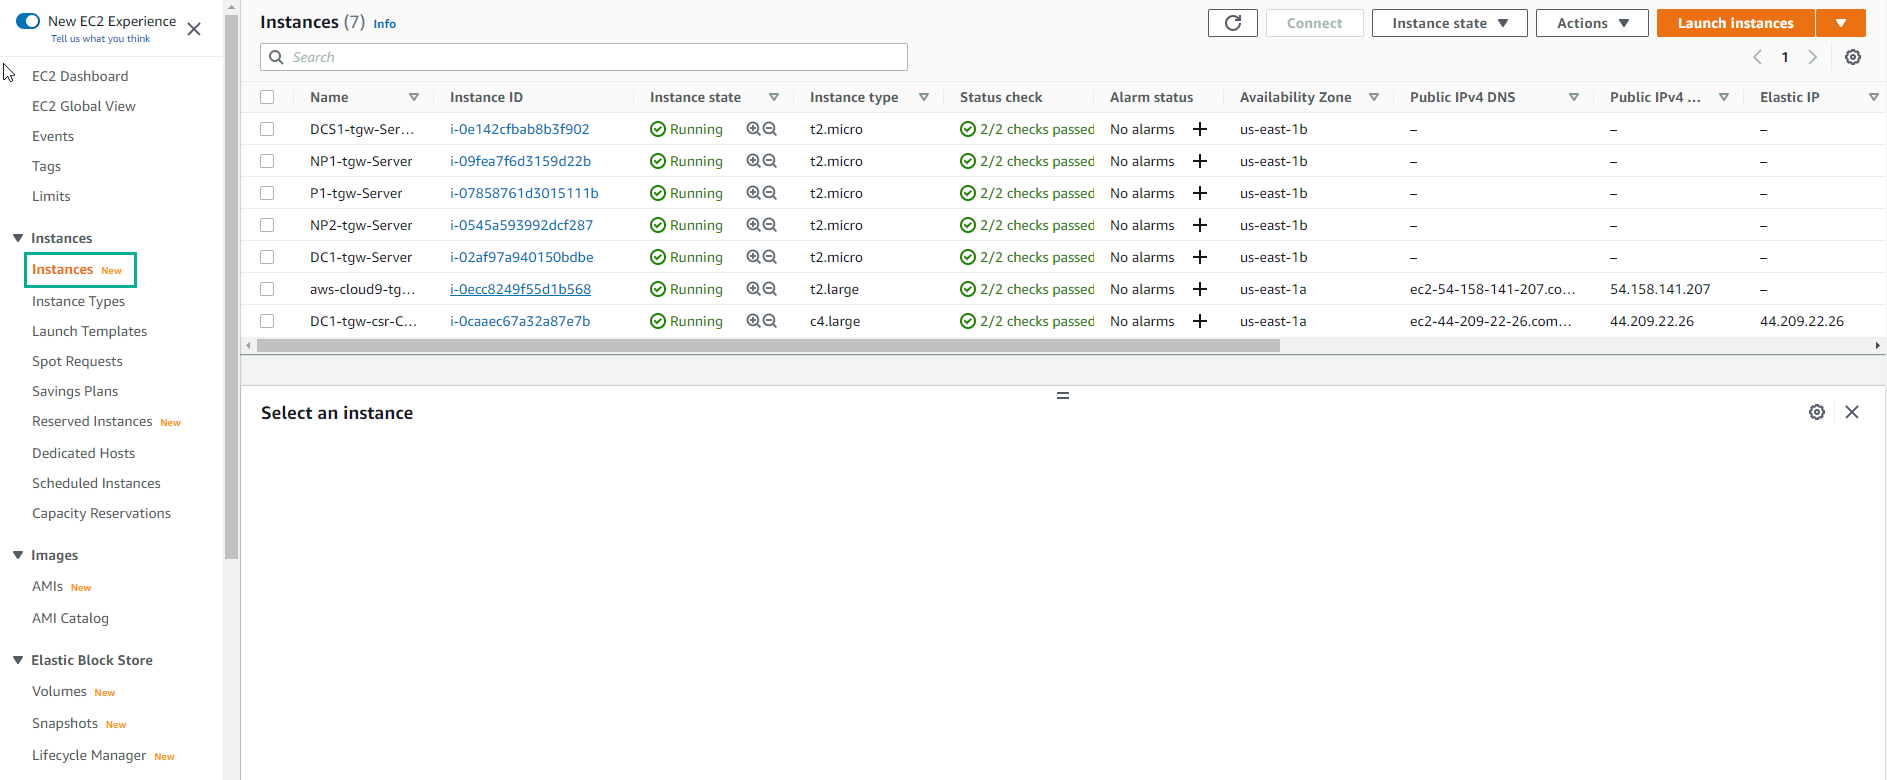
- Go to EC2 to see deployed instances.