Additional ECMP Paths
Additional ECMP Paths
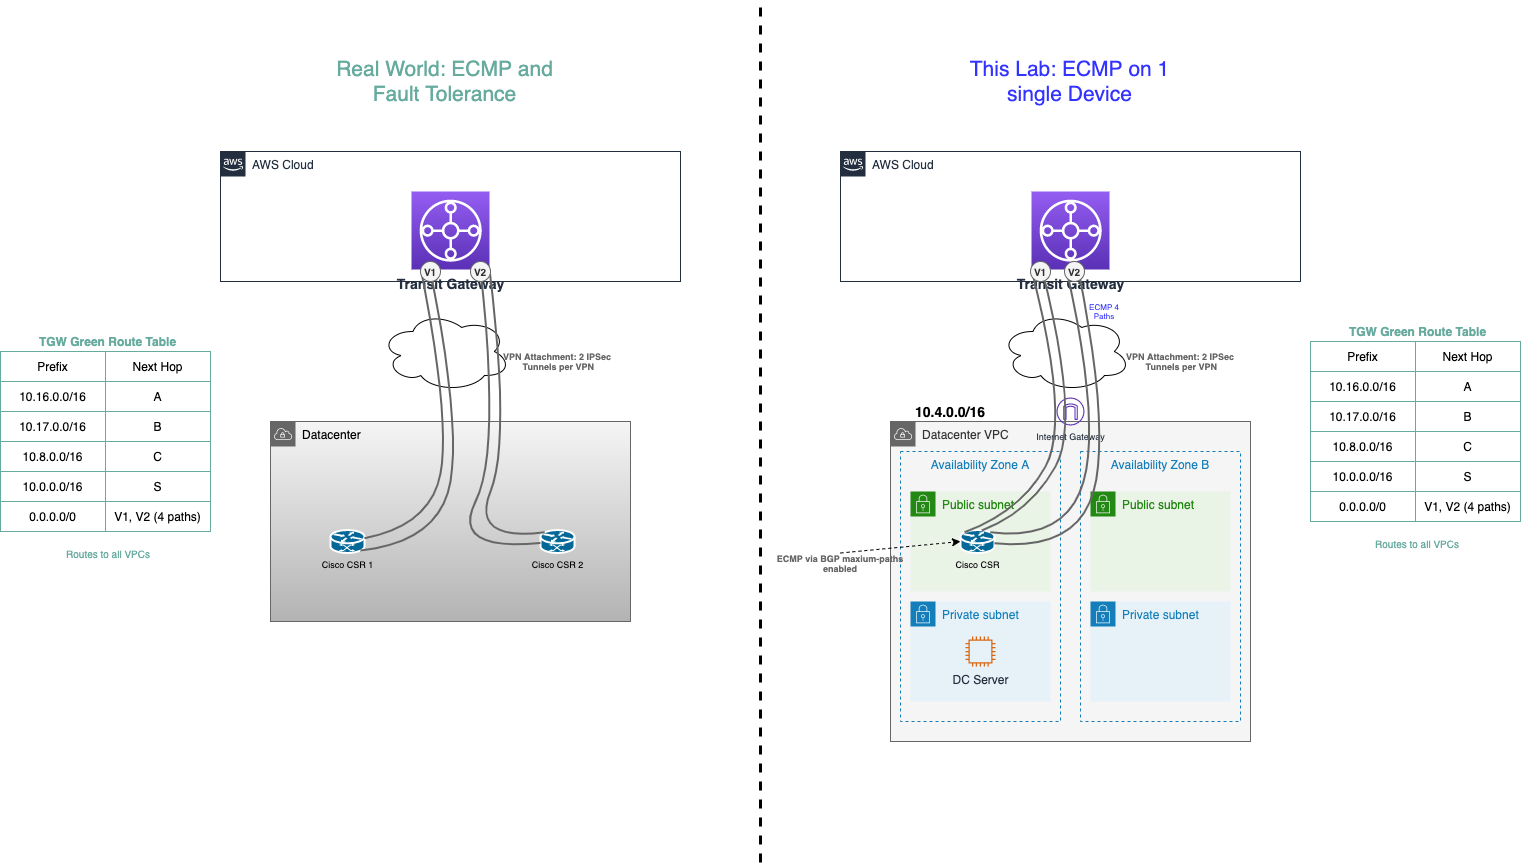
Equal-cost multi-path routing (ECMP) is a routing strategy where packet forwarding to a single destination can occur over multiple best paths with equal routing priority. Multi-path routing can be used in conjunction with most routing protocols because it is a per-hop local decision made independently at each router. It can substantially increase bandwidth by load-balancing traffic over multiple paths; however, there may be significant problems in deploying it in practice.
Bandwidth scaling and High Availability are built into the Transit Gateway inherently as well as via multiple Availability Zone (AZ) attachments to our VPCs. However; for connectivity back to our Datacenter, we have some things to consider. In the real world, we would create another Customer Gateway on a totally separated physical device. Ideally, this is physically as fault-isolated from the first Customer Gateway as we can make it (think, across the room or even in another communications room with separate connectivity and power if we have it). But in order to distribute load across both Customer Gateways within the datacenter you would typically use another tier of routers (shown below as a core router) to balance the traffic. For our demo purposes, lets build it on the same Cisco CSR we have in our simulated Datacenter so we can see more ECMP in action.
-
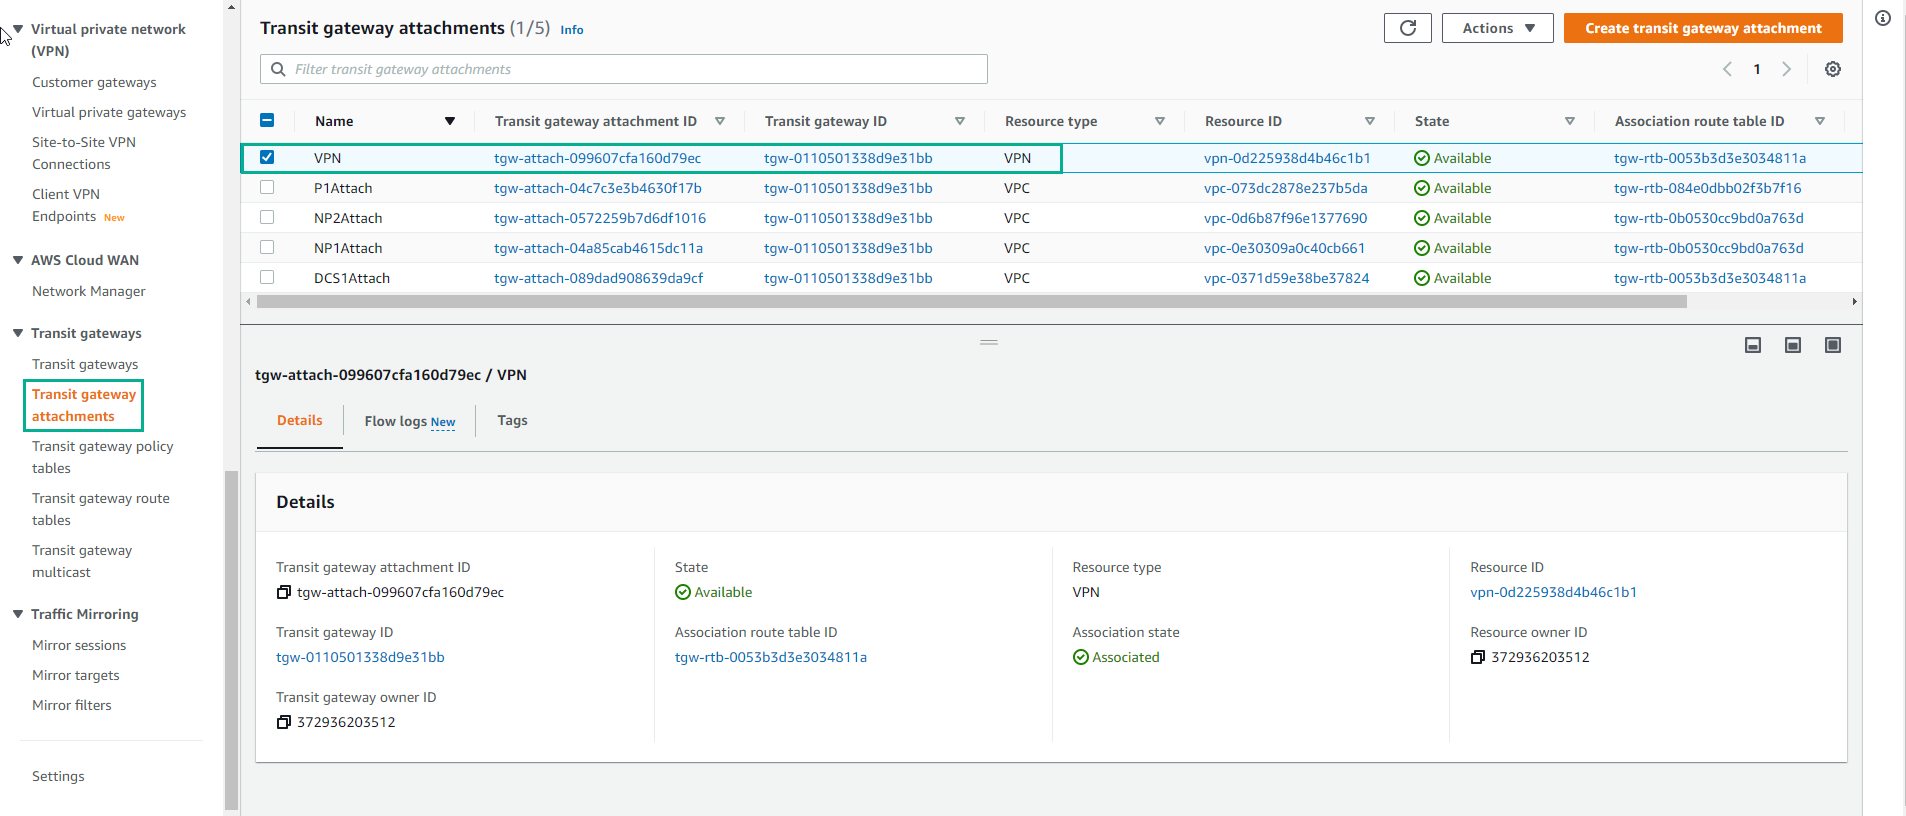
Access to Transit Gateway attachment
- We will create a VPN-ECMP transit gateway attachment.
-
Make configuration
- Transit Gateway ID will have a name Tag matching your first CloudFormation Stack name.
- Attachment Type is VPN
- Customer Gateway (CGW) will be Existing. Note: the CloudFormation template created the CGW. It is the same IP address used in the previous VPN.
- Leave Routing options set to Dynamic(requires BGP). Note: BGP is required if you want traffic to balance across more than one VPN tunnel at a time (ECMP or Equal Cost Multipathing)

-
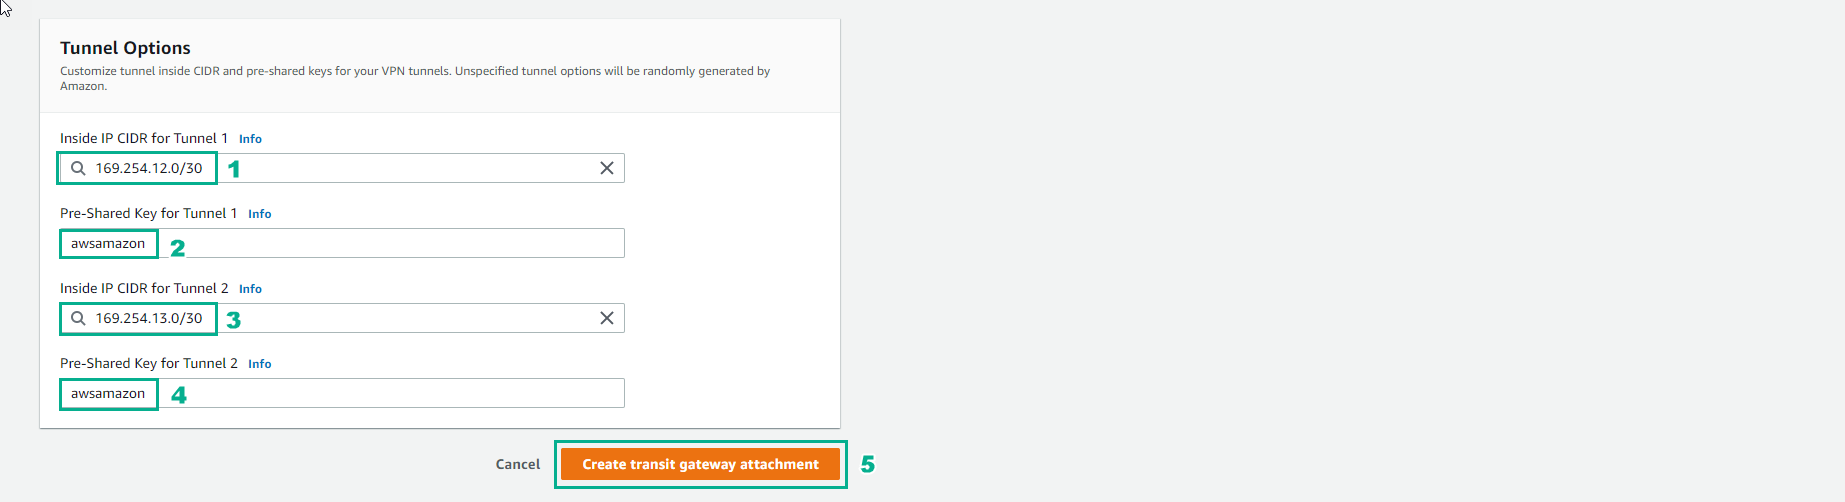
Configure the Tunnel
- For Inside IP CIDR for Tunnel 1 use 169.254.12.0/30 for CIDR. Note: there are different ip addresses from the previous VPN
- Do not tick Enable Acceleration as we won’t be using it for this lab. However, for production environments GA delivers an enhanced VPN experience thanks to the use of anycast endpoints being advertised from our global network of points of presence (POPs)
- For Pre-Shared Key for Tunnel 1 use awsamazon
- For Inside IP CIDR for Tunnel 2 use 169.254.13.0/30 for CIDR. Note: these are different ip addresses from the previous VPN
- For Pre-Shared Key for Tunnel 2 use awsamazon
- Once the page is filled out, click Create attachment at the bottom right.
- Wait about 7 minutes, finish creating VPN-ECMP transit gateway attachment.

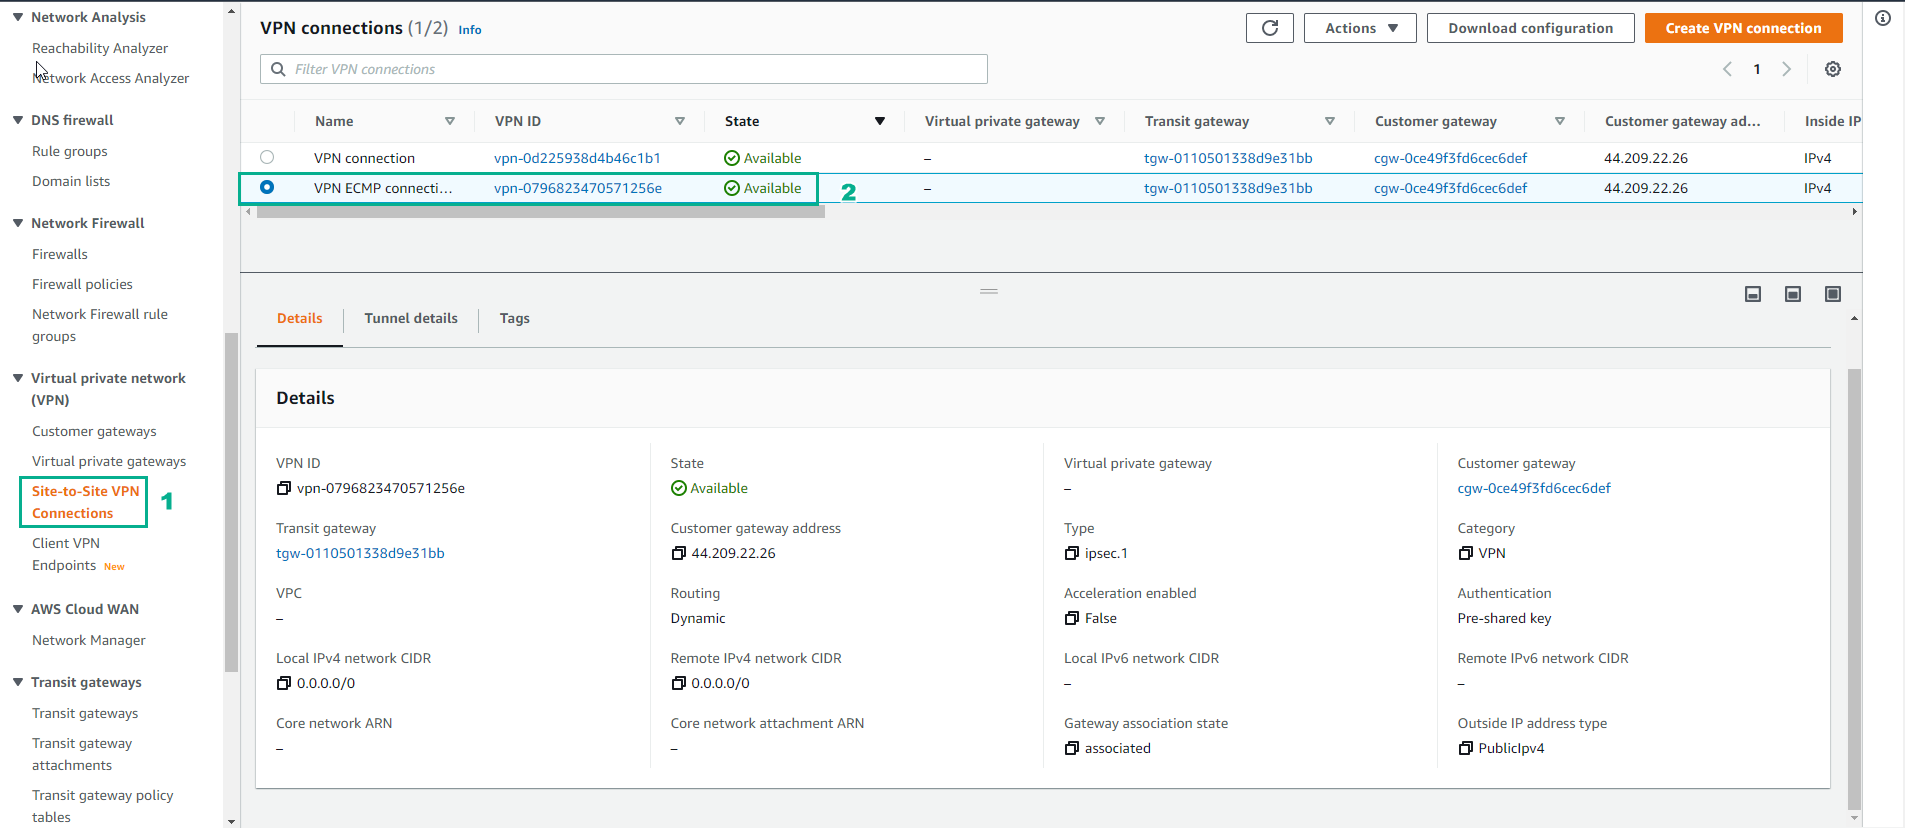
- Check VPN-ECMP connection
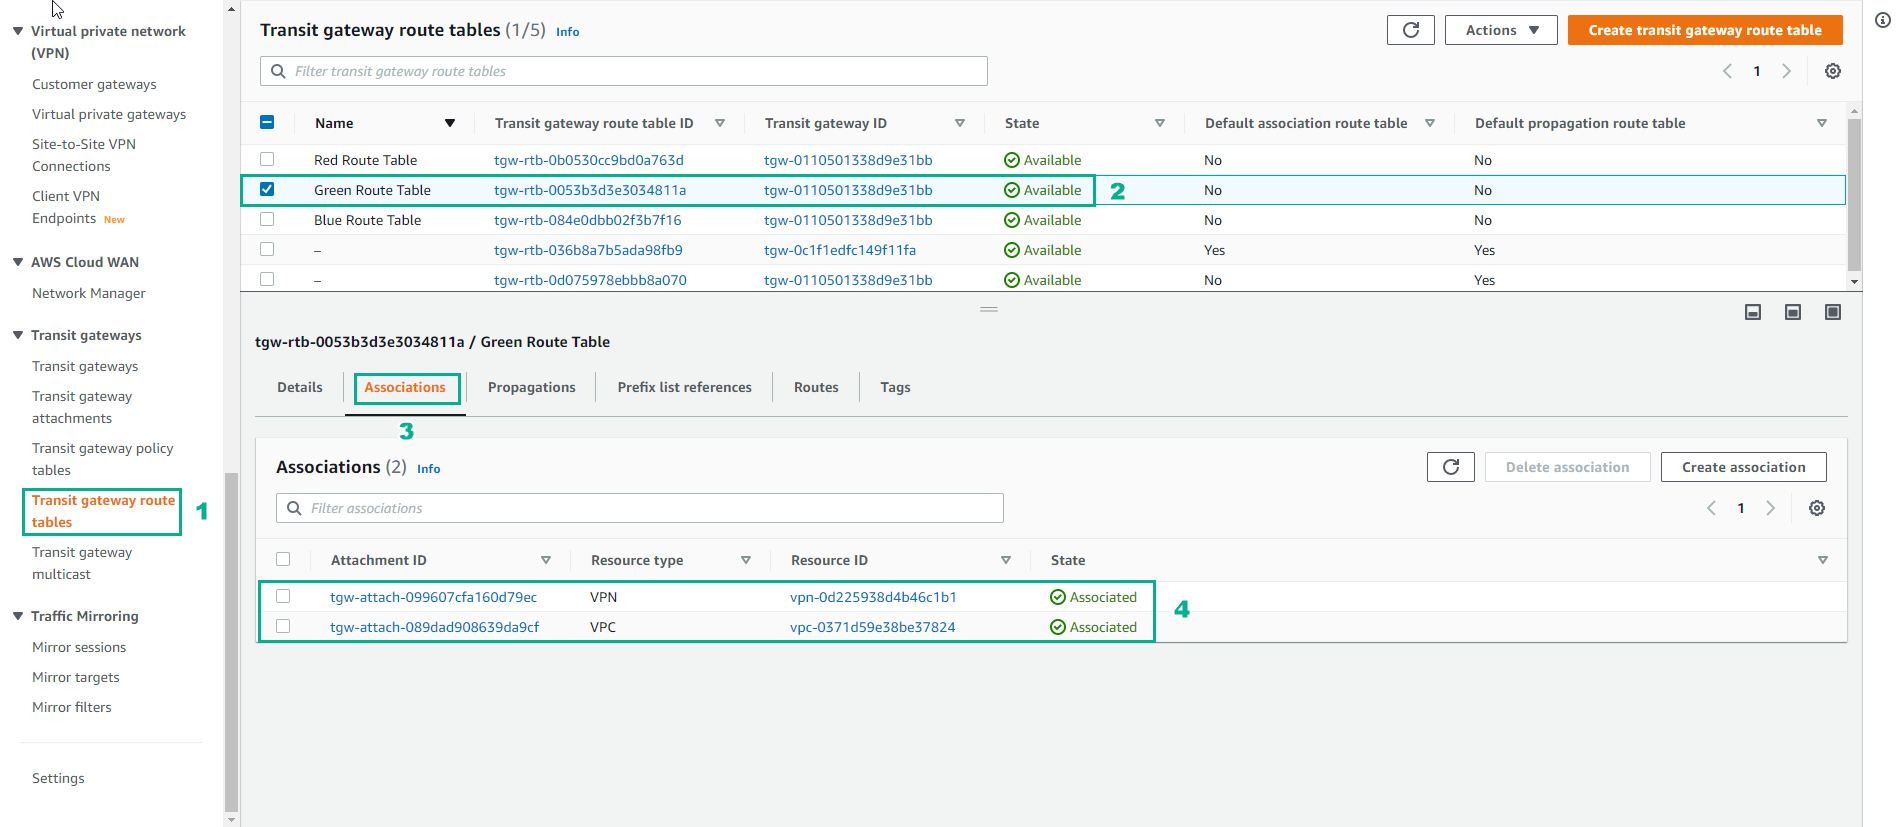
- Make access to Transit gateway route tables
- Select Green Route Table
- Select Associations
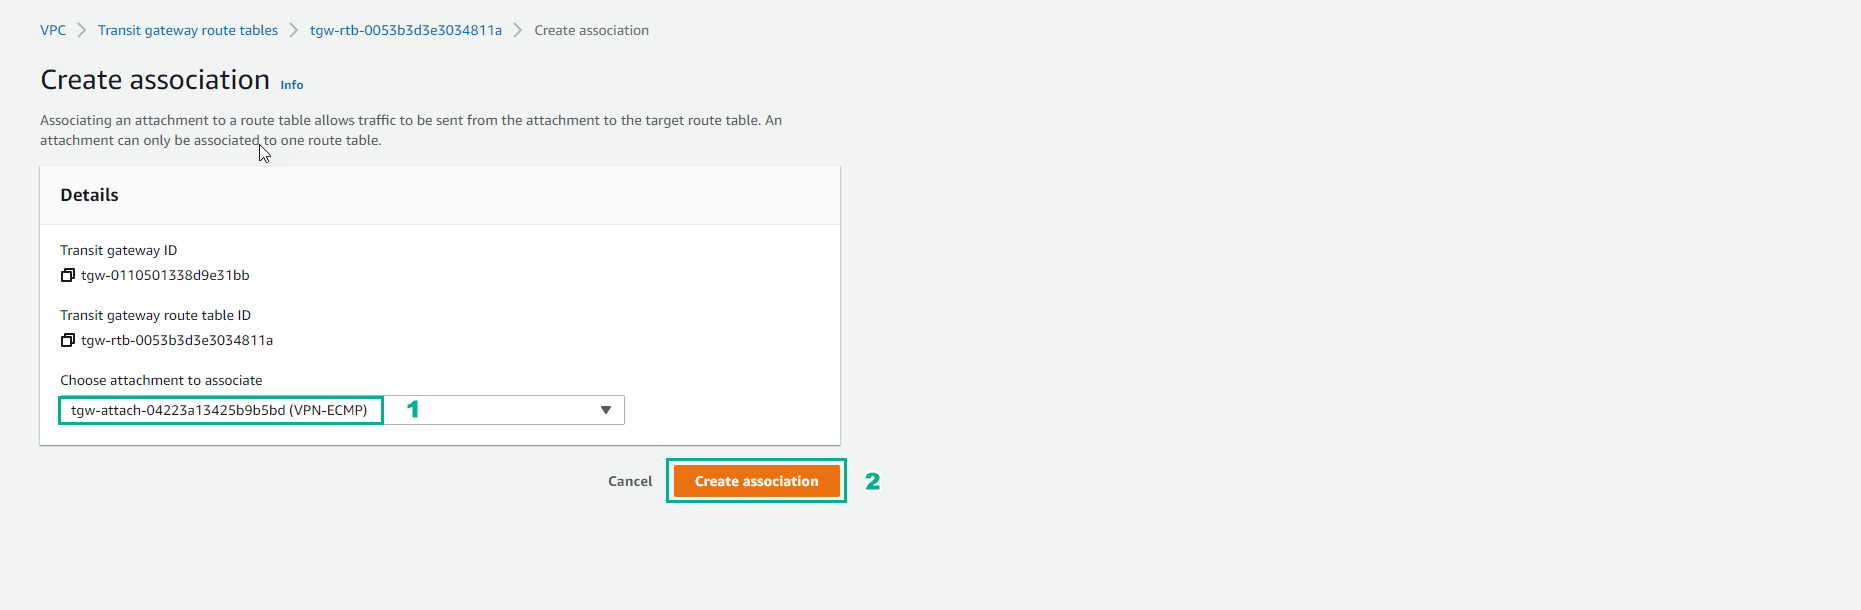
- Select Create association
- In the Create association interface
- Select Create association
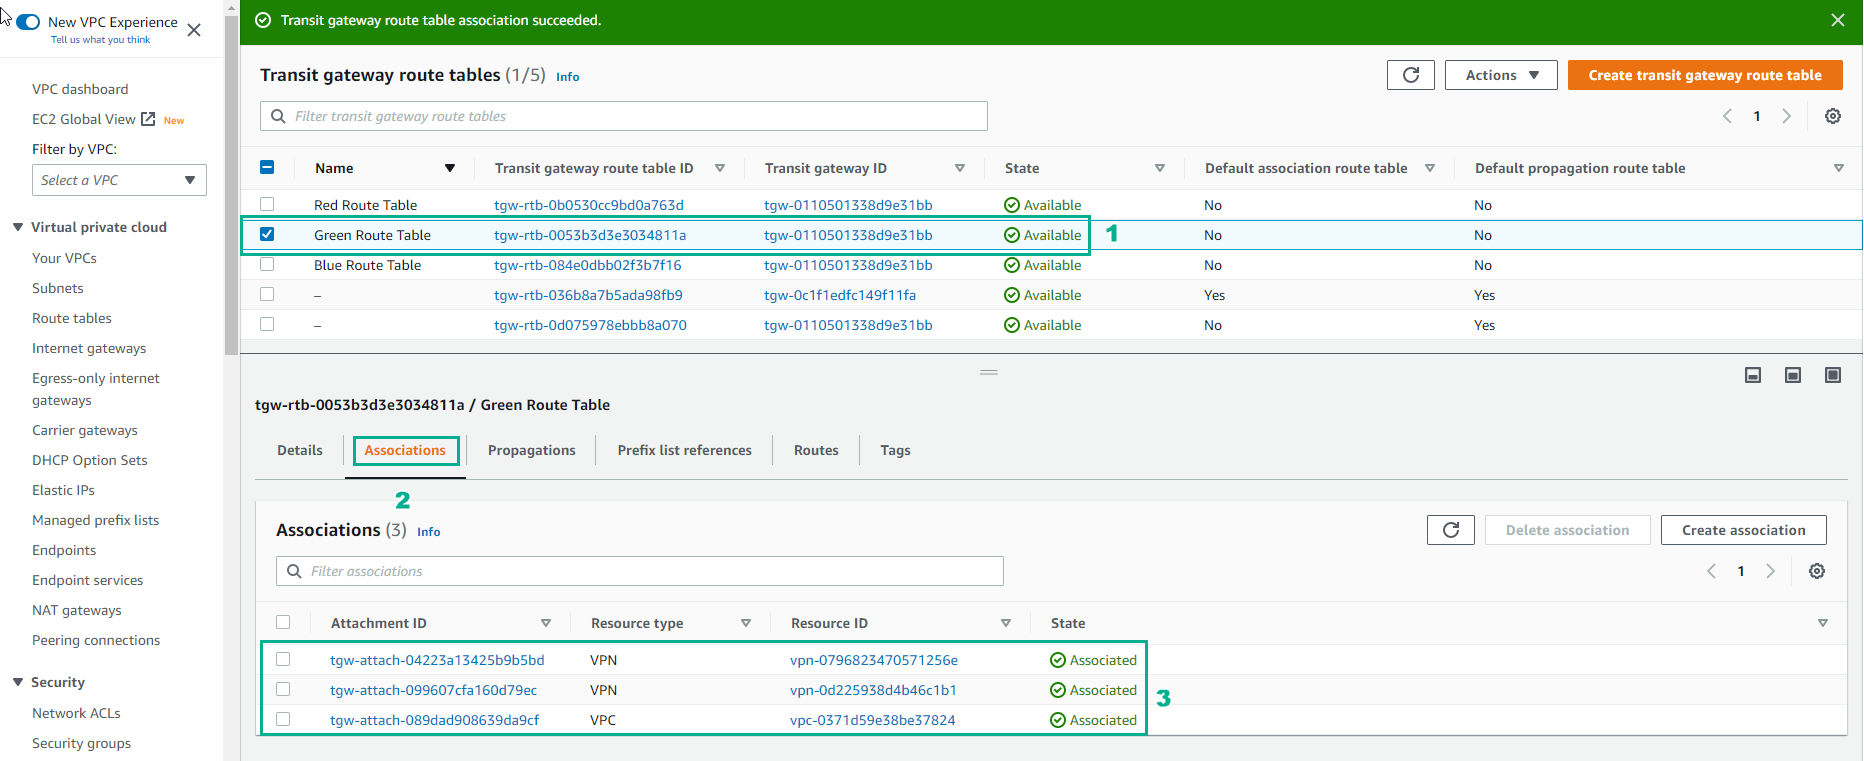
- Complete creation association
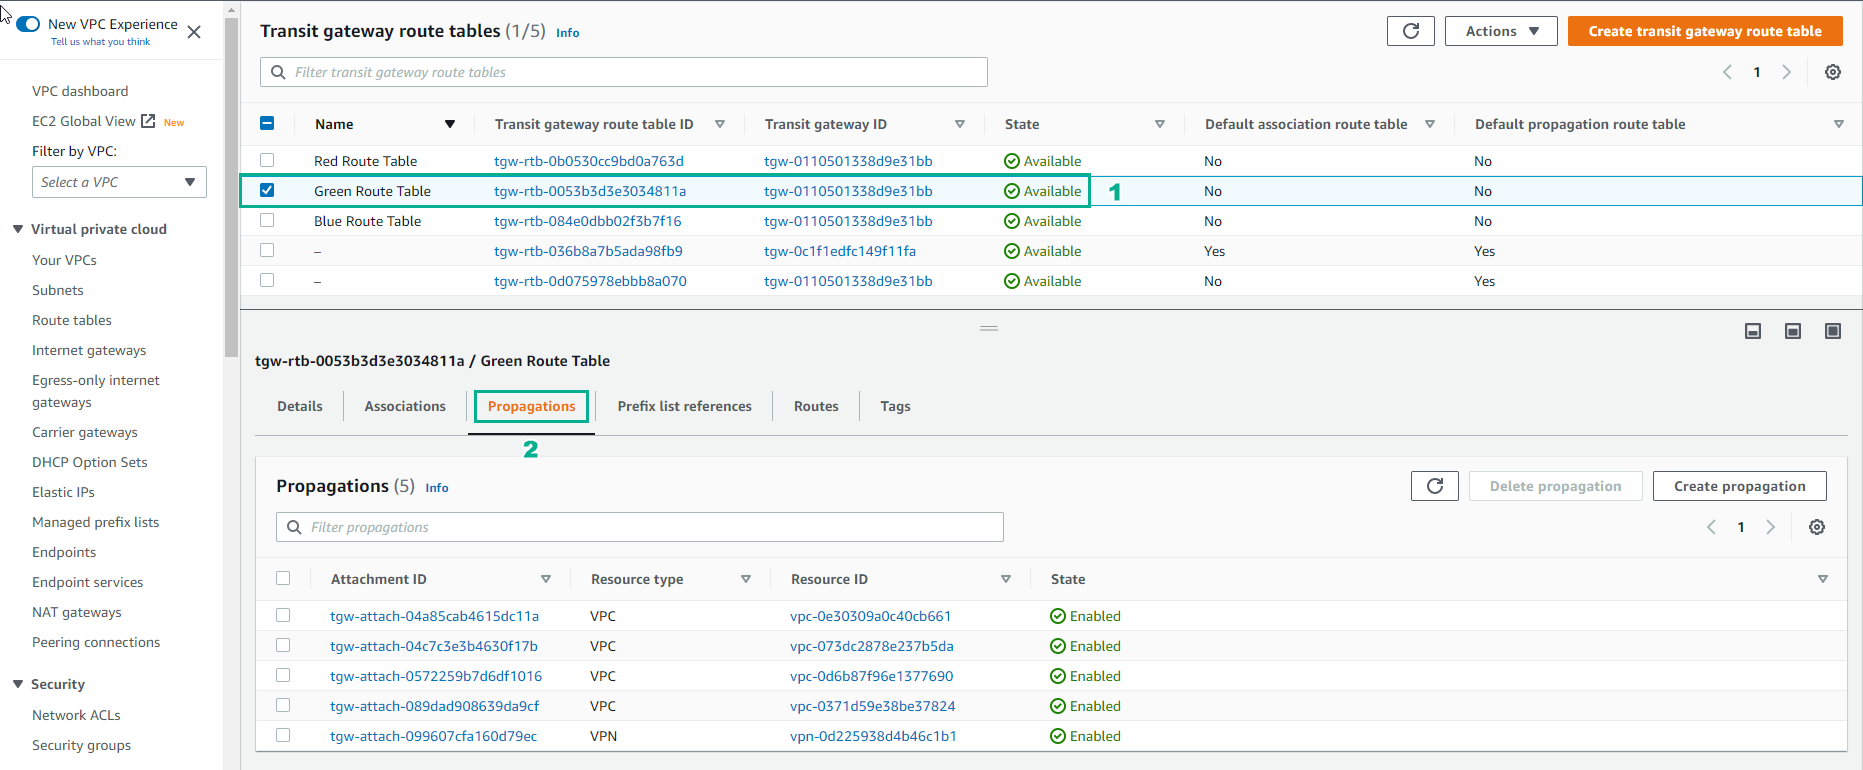
- Select Green Route Table
- Select Propagations
- Select Create propagation
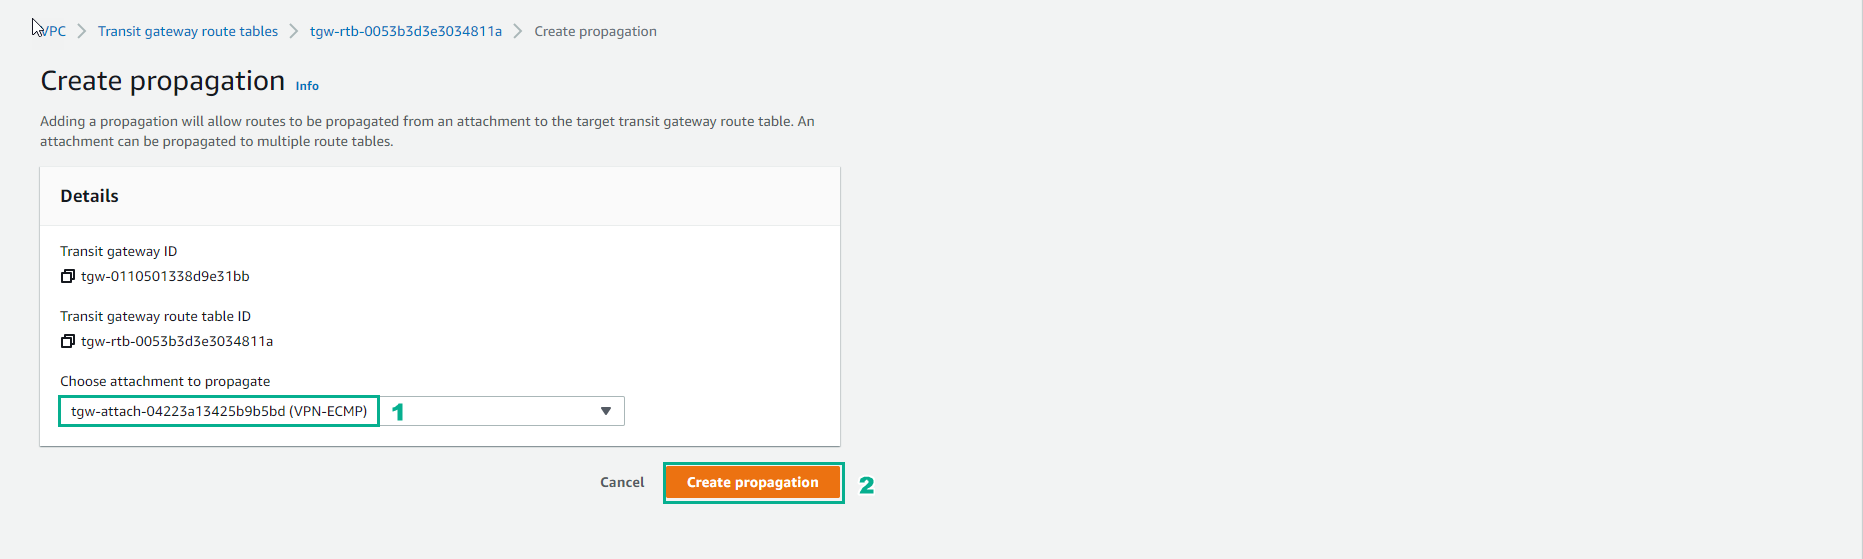
- In the Propagation interface
- Select Create propagation
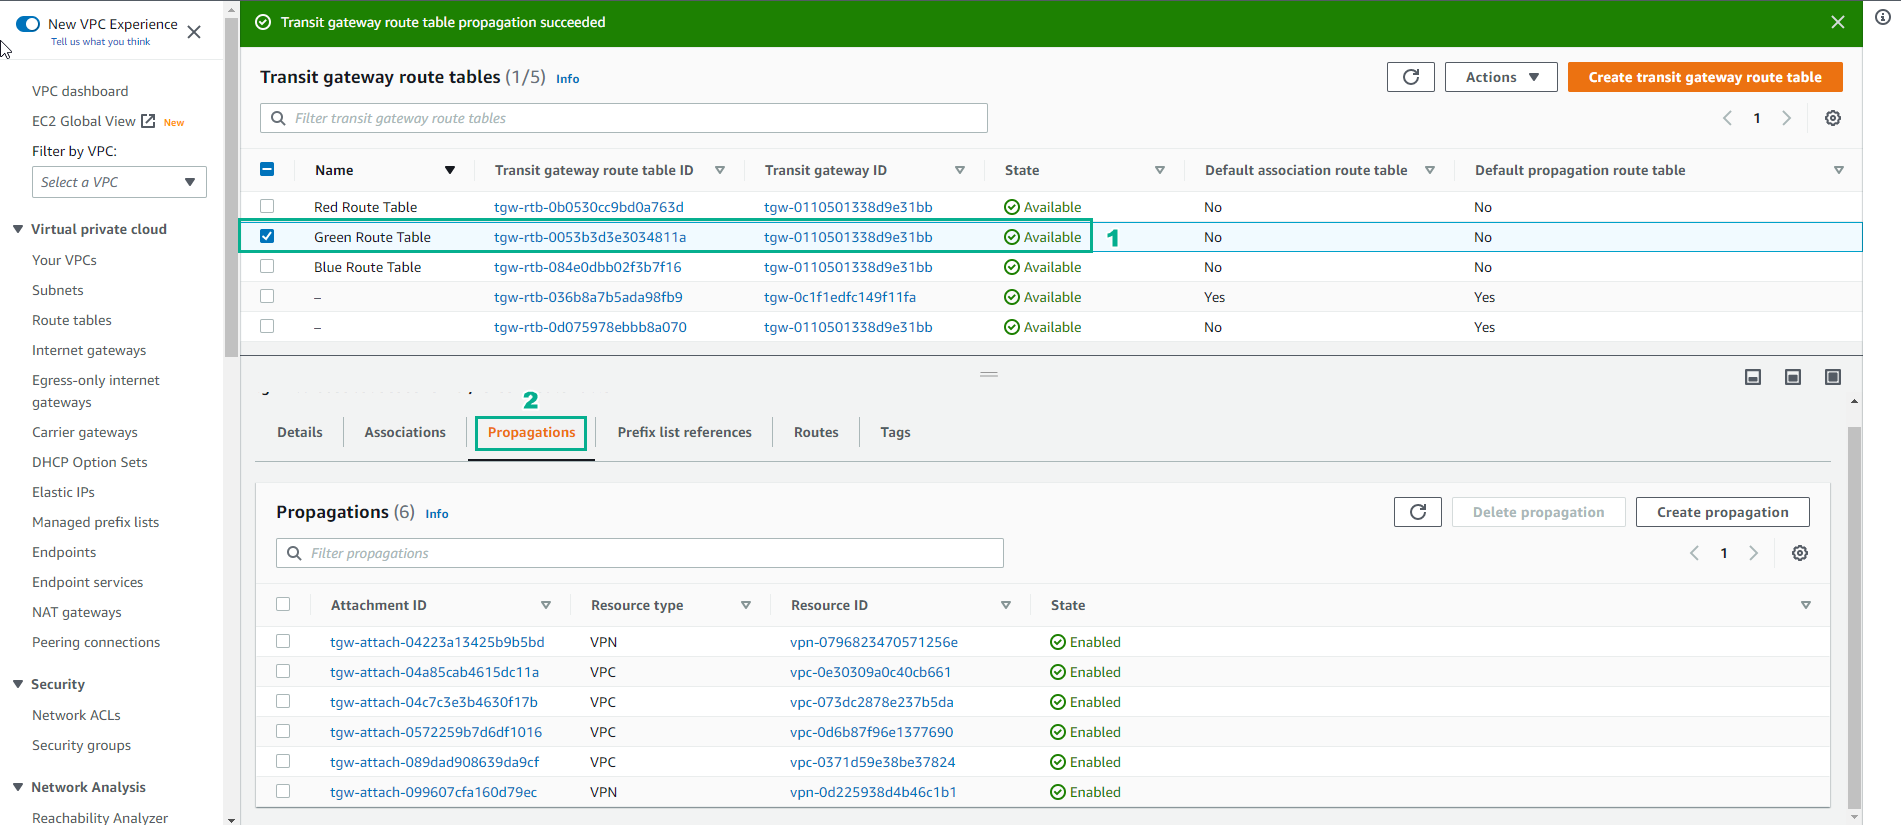
- Finish creating Propagation. Repeat the Progapation creation step for Red Route Table and Blue Route Tables.
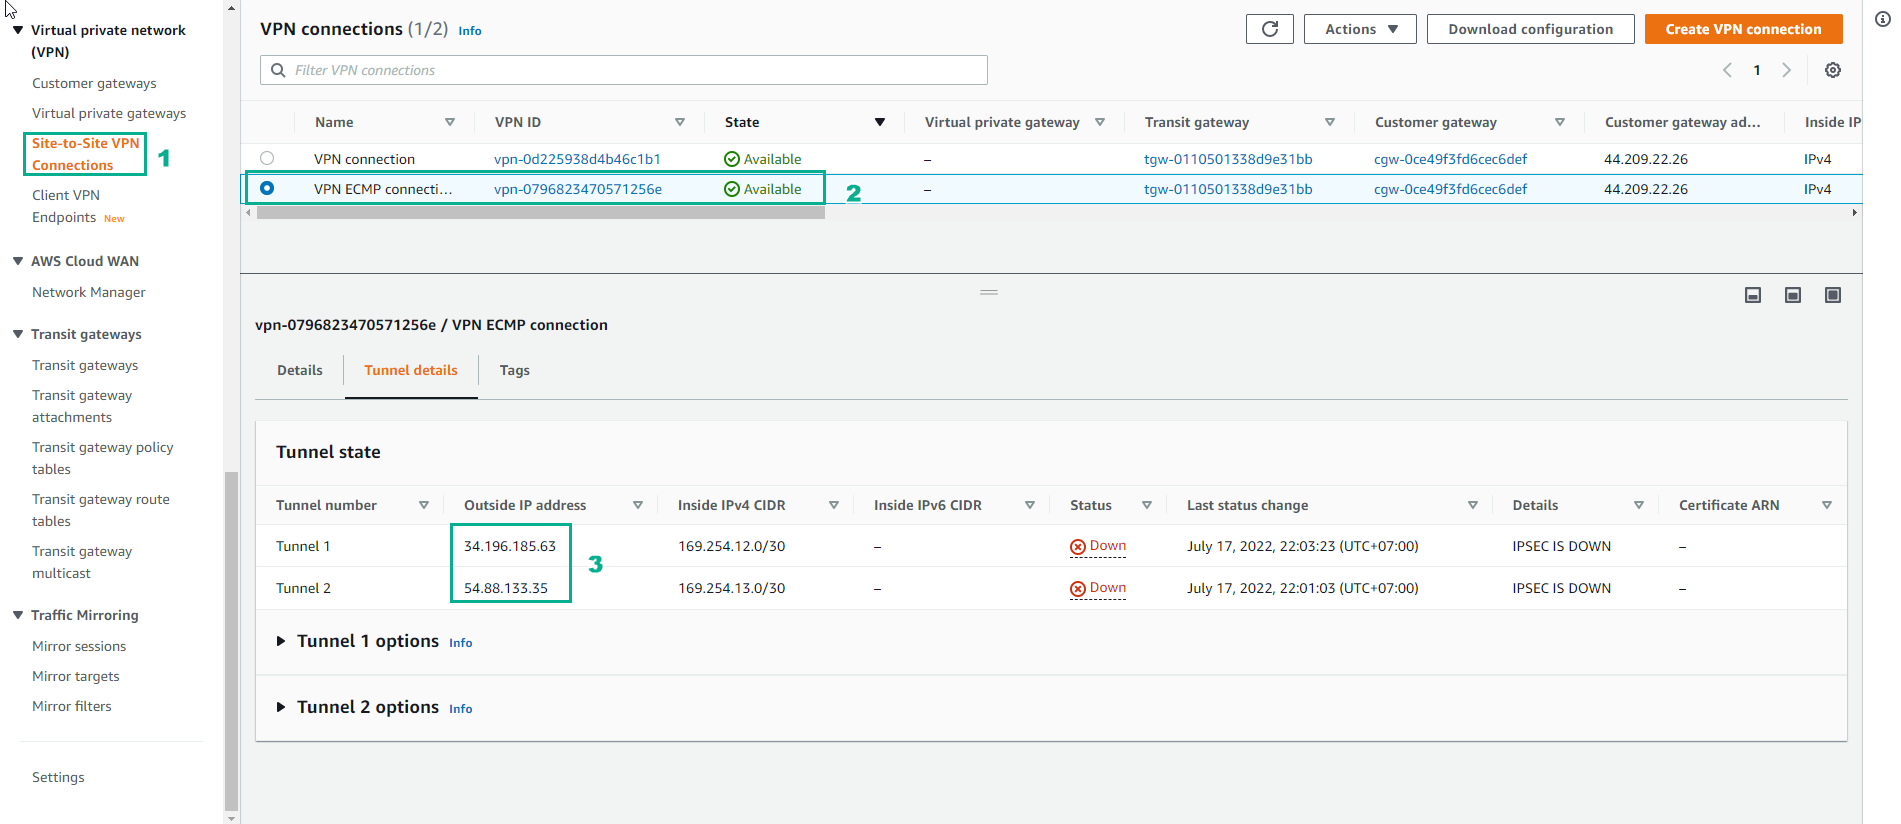
- Access to VPN connections
- Select VPN ECMP connection
- Select Tunnel details
- Use Outside IP addresses for the next step to configure.
- Currently not configured so status Down
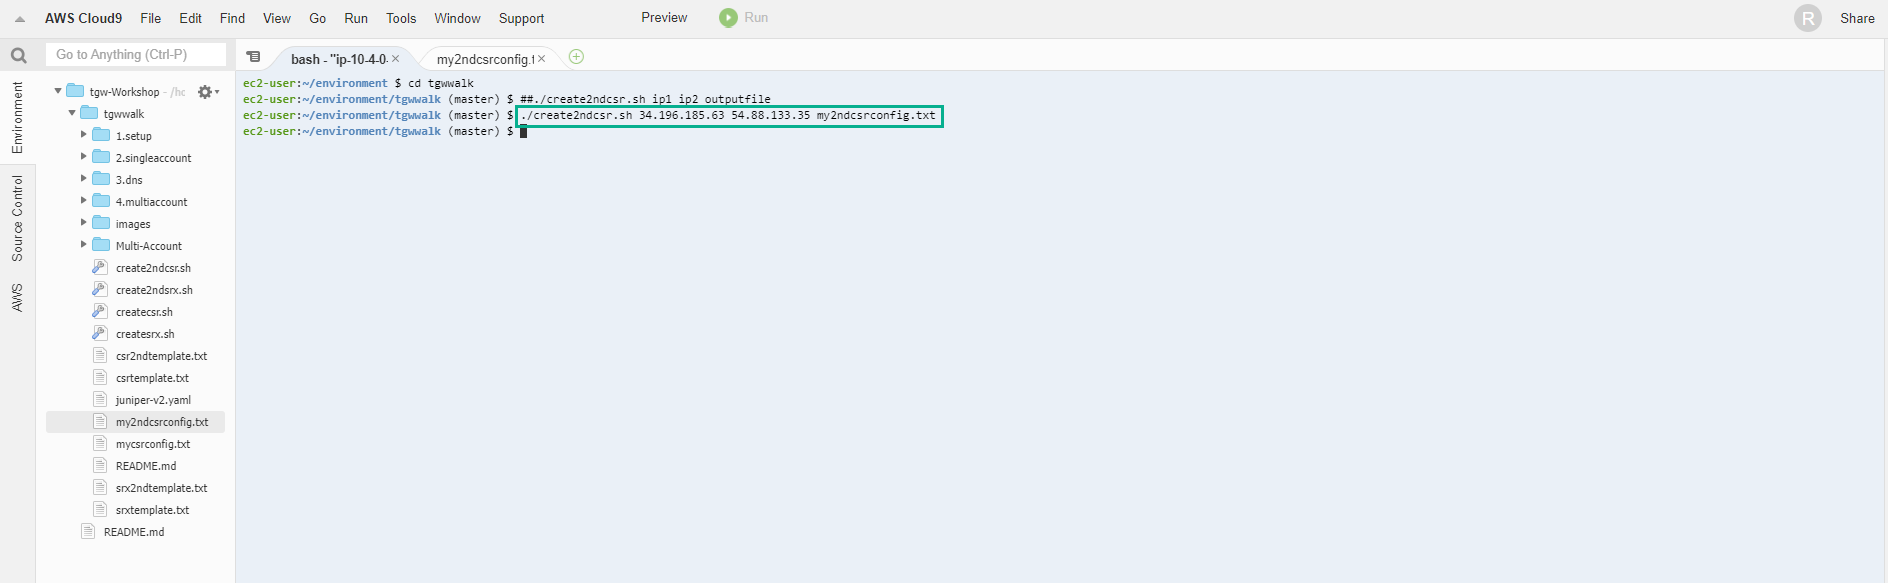
- Access the AWS Cloud9 interface, perform the configuration by running the command to create the file my2ndcsrconfig.txt
./create2ndcsr.sh publicip1 publicip2 my2ndcsrconfig.txt
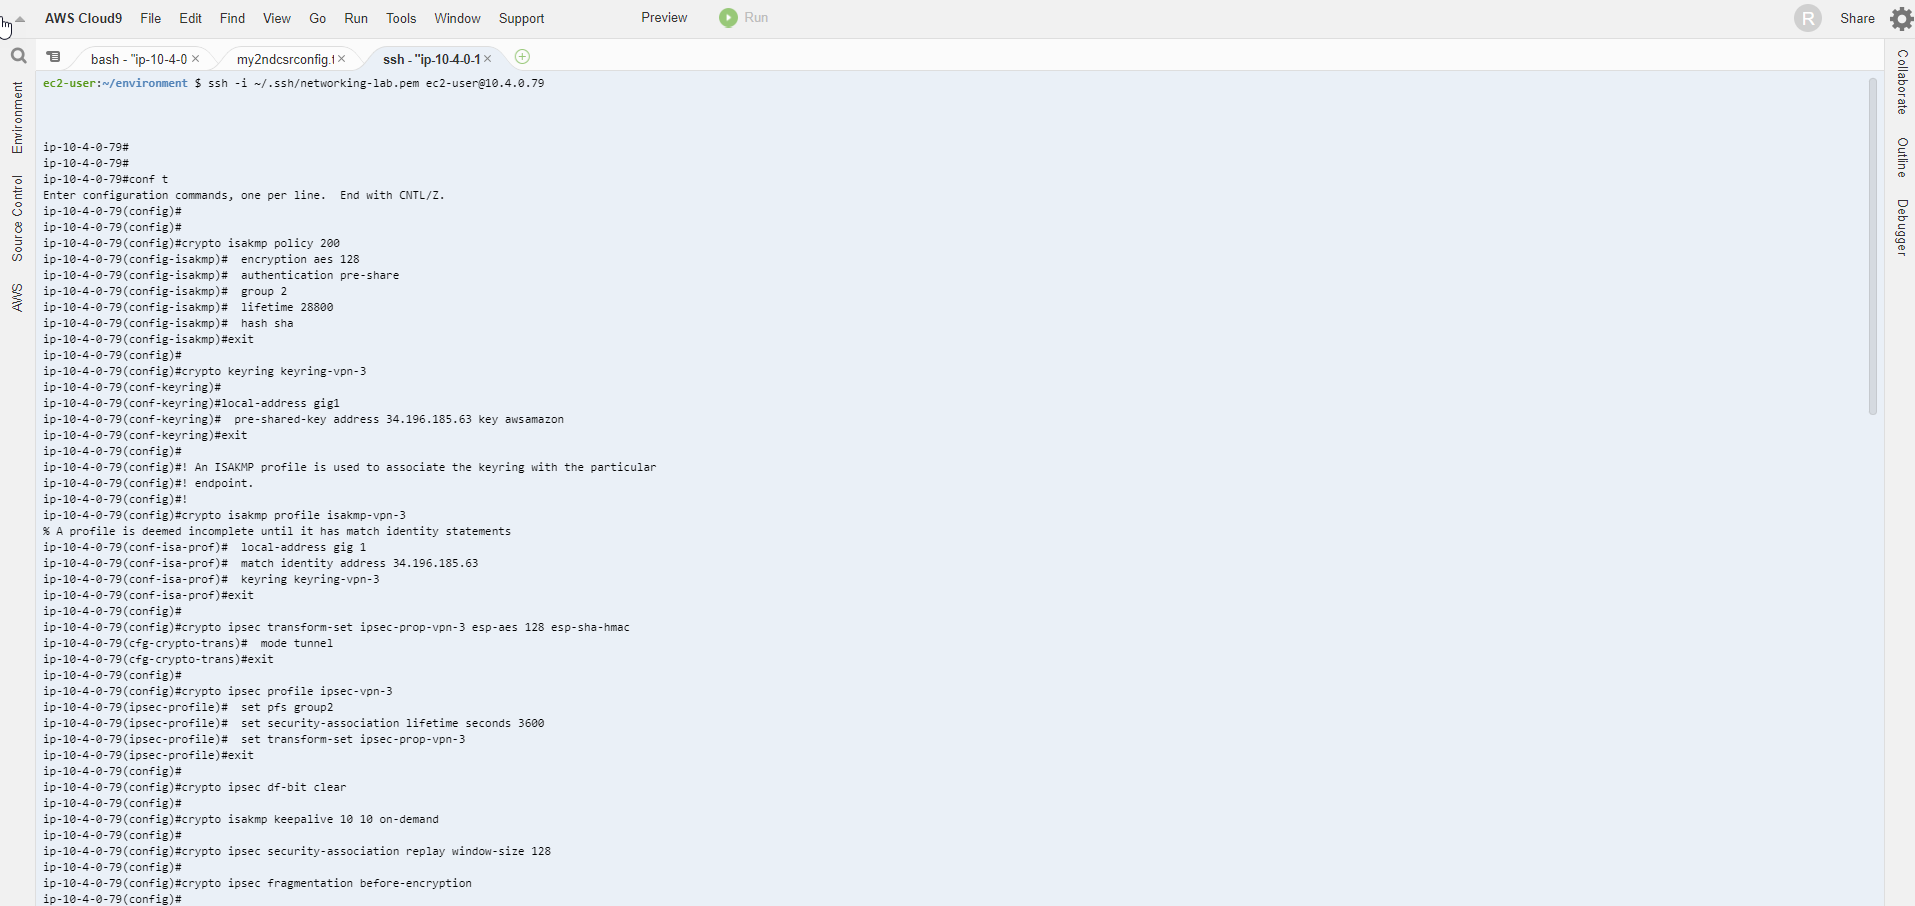
- Make SSH connection from Output of CloudFormation
- Execute configuration command
conf
- Then copy the contents of the file my2ndcsrconfig.txt and configure.
- We check to see more Tunnel3 and Tunnel4
sh ip int br

- Make sure we’re seeing the routes on the Cisco CSR. First we can see what BGP is seeing: show ip bgp summary. The most important thing to look at is State / PfxRcd (Received Prefixes). If this is Active or Inactive (probably a wrong neighbor statement: IP address, AS number) then there is a configuration issue. What we want to see is a number. In fact, if everything is set up correctly, we should see 4 for each neighbor:
sh ip bgp summ

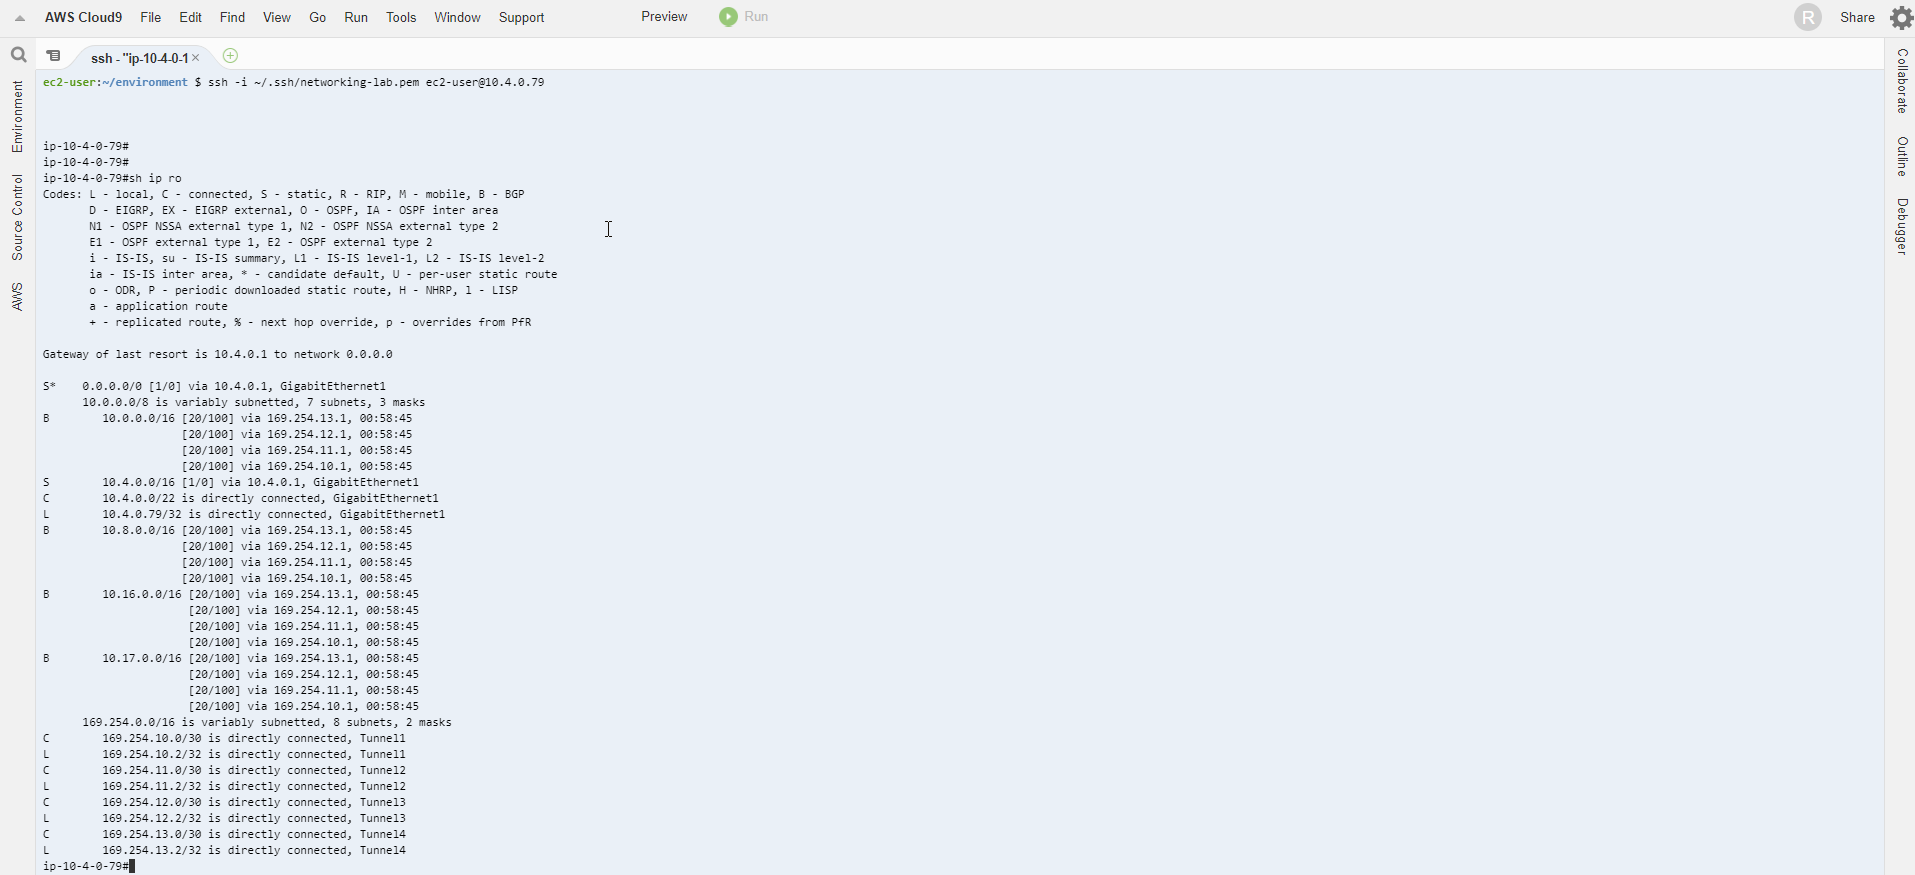
- To verify the setting of Equal Cost Multipathing (ECMP) use the command sh ip ro. The tunnels are all up.
sh ip ro
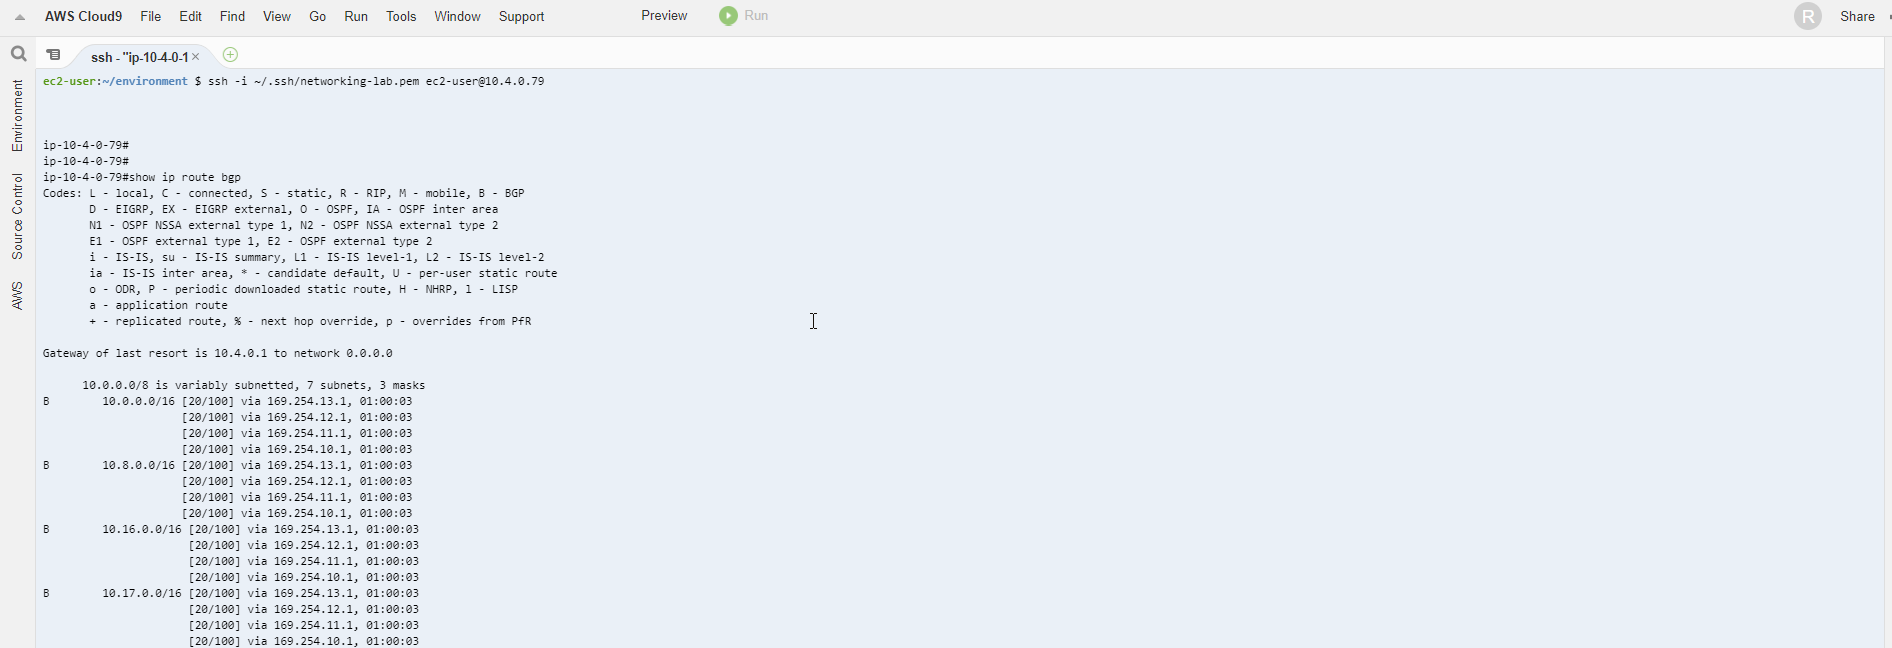
- Alternatively, you can use show ip route bgp as we did before to see only BGP routes).
show ip route bgp